I once met a woman in Talkeetna who used to make yogurt on weeks-long horse trips by warming the milk over the fire, stirring in old yogurt, pouring it into a jar and leaving it overnight in a rolled up sleeping bag. This recipe is a little more high maintenance than that, but not much.
The only ingredients are milk and yogurt, and if you’d like, a jam of your choice. But: don’t skip reading the top part of this recipe because the ingredients, equipment and technique are everything. First: the milk. I have only tested this recipe with whole milk and have sometimes added a quarter cup of cream. (You can too, if you like cream-top!) You can make yogurt following a similar recipe with non-dairy milks or less fatty milks, but I recommend researching those a little first. I’ll also note that I love Alaska Range Dairy milk with my whole heart, but making yogurt with non-homogenized milk is tricky. Save that stuff for drinking.
If I’m feeling fancy, I look for whole, organic “grassmilk” from grass-fed cows at the grocery store. It runs about $7 a half gallon and tastes delicious. Next, you’ll need to find a plain yogurt with active cultures. I have tested Nancy’s, Brown Cow and Wallaby brands. All of them worked, but my favorite comes from Ellenos yogurt, which I have found at Costco and the Fred Meyer health food section. Your yogurt should come out similar to the one you choose, though not as thick. (You can thicken your yogurt by straining it in cheesecloth.)
For your jammy bit, pick anything sweet and sticky — homemade jam from your pantry, store-bought jelly, a big blop of honey. I’m really into tropical flavors this winter. I throw a 14-ounce pouch of Goya passion fruit pulp in a pan with a half cup of sugar and cook it down till it thickens. (I’ve found this at Red Apple Market and Midtown Sagaya in the freezer section. It comes in guava and pineapple, too.)
Finally, a note on temperatures and equipment. Horse trip lady had it down, but me and you, we need thermometers. A candy thermometer is a low cost and worthy investment; they’re often at the grocery store. You can also use a digital kitchen thermometer. People say if you start with a very cold pot, you are less likely to be scrubbing a circle of scorched milk off the bottom of the pan later. This works for me sometimes. I set my yogurt in a warm oven with the light on. Some people wrap it in a towel with a hot pad or put it in a furnace room — the internet is full of suggestions. The idea is to leave it in a place a little warmer than room temperature. (While you wait, make granola to go with it!)
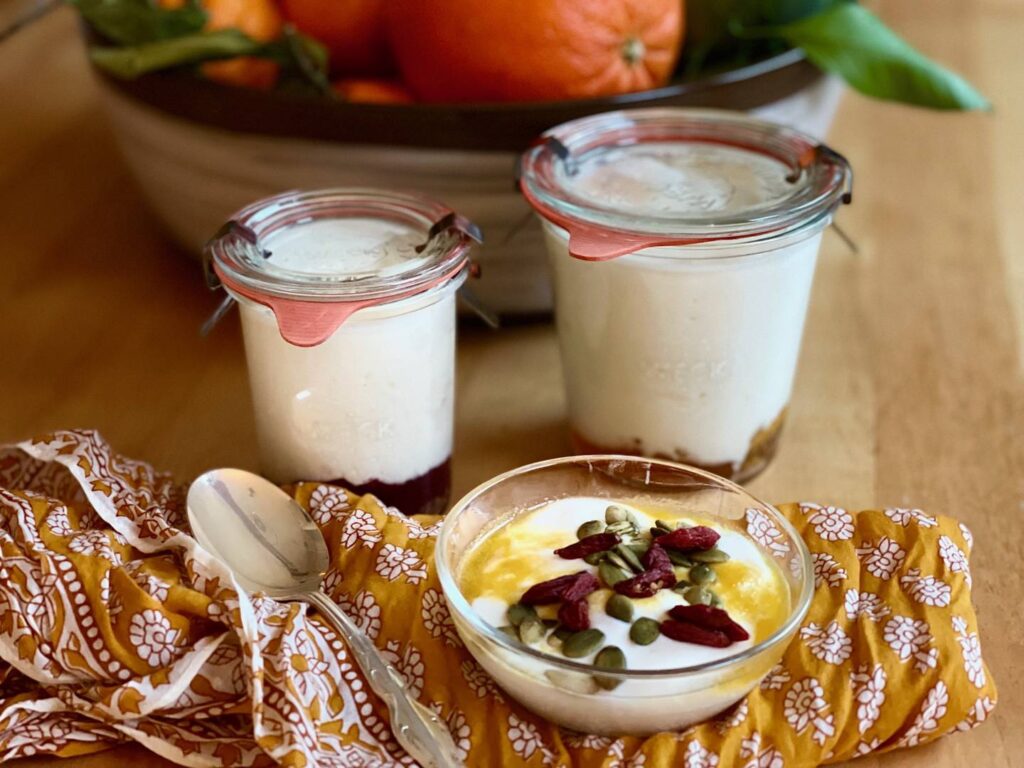
Jammy homemade yogurt pots
Makes 16 ½-cup servings
1 half gallon of good-quality homogenized whole milk
4 tablespoons plain yogurt with live cultures
2-3 cups fruit jam
Preheat your oven to its lowest “keep warm” setting. As soon as it signals that it’s preheated, turn it off and flip the oven light on. Fill a heavy-bottomed Dutch oven with very cold water, dump it out and quickly pat dry. Clip a candy thermometer on the side of the cold Dutch oven, fill with milk and heat on medium until bubbles collect around the edges and in the middle. You want to heat it until the thermometer measures between 180 and 200 degrees. (Take care not to let it get too hot.) Remove the pan from heat and allow it to cool to between 110 and 120 degrees. If a skin forms on the top, gently scoop it off. Scoop out a cup of the warm milk and stir the yogurt in until it’s smooth. Return it to the pot, stir, cover and place in the warm oven with the light on, 8-12 hours.
To make jammy-pots, choose lidded jars. Spoon 2-3 tablespoons of jam in the bottom of each and top with yogurt. They keep for about a week in the fridge.
This recipe originally appeared in the Anchorage Daily News.
I love this recipe. I will try it. Keep cranking out these recipes.
yay! thanks!